
If you run an aggregate, mining, or recycling operation, you already know that a replacement crusher rotor isn't something you order on a whim. It's a heavy, precision-machined component that sits at the heart of your horizontal shaft impactor (HSI), and getting the replacement process wrong - or sourcing the wrong part - can cost you days of downtime and thousands of dollars in secondary damage.
This guide walks through the complete process: how to tell when a rotor genuinely needs replacing, how to safely remove and install one, and what to do when you can't get your hands on the original drawings. It's written for maintenance managers and procurement teams who need a practical reference, not a marketing brochure.

When Does a Crusher Rotor Actually Need Replacing?
Before any tools come out, you need to know whether you're looking at a wear-part fix or a full rotor replacement.
The clearest early warning sign is a drop in throughput that doesn't correspond to a change in feed material. If tons-per-hour falls more than roughly 10% below your established baseline, it's worth opening the inspection hatch. Other signals include:
- Abnormal vibration that persists after checking belt tension and feed consistency
- Bearing temperature running higher than normal, which often points to rotor imbalance rather than a bearing fault on its own
- Visible cracks, bending, or deformation on the rotor body itself - not just the blow bars
- Uneven wear patterns on the blow bars that keep recurring even after balanced replacement
A useful rule of thumb: if only the blow bars (the replaceable striking bars bolted to the rotor) are worn, you're looking at a wear-part swap, not a rotor replacement. But once wear or damage extends into the rotor body - the disc or shaft assembly the bars are mounted to - repair options narrow quickly, and a full replacement crusher rotor is usually the safer and more cost-effective path.
Practical tip: Weigh removed wear parts against their installed weight. If you're discarding parts at less than 50% utilization, you're likely changing too early. If you're waiting until the rotor itself shows damage, you've probably waited too long - and that delay tends to shorten bearing life and increase repair costs down the line.
Why Rotor Design Matters Before You Start
Not all rotors are built the same way, and that affects both how you diagnose problems and how you approach removal.
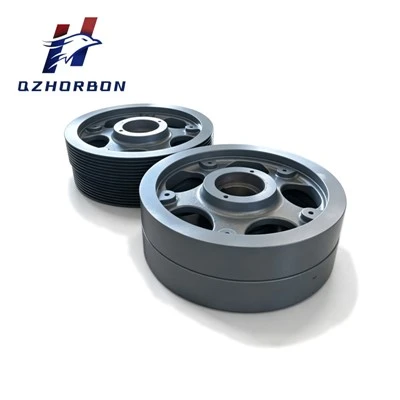
A rotor is essentially a heavy rotating disc or drum, driven by the crusher's motor, that carries the blow bars and generates the kinetic energy needed to fracture material on impact. Heavier, solid-steel rotor designs tend to run more stably and resist deformation under shock loads, which is why they're common on primary crushers processing large, hard feed. Lighter rotor configurations are more common on secondary or tertiary machines where fine control over particle shape matters more than raw impact force.
One misconception worth addressing directly: a heavier rotor does not automatically mean higher output. What it typically buys you is stability - better resistance to vibration and imbalance under variable feed conditions. Production capacity depends far more on rotor speed, blow bar configuration, and how well the machine is fed than on rotor weight alone.
Understanding your specific rotor configuration matters because it determines how the assembly comes apart - bolt patterns, bearing housing design, and how the rotor is keyed to the drive shaft all vary by manufacturer and model.

Complete Rotor Removal & Installation: Step-by-Step
This is the core of the job. Always cross-check against your crusher's OEM manual for model-specific torque values and clearances - the sequence below covers the general process common across most horizontal shaft impactors.
1. Safety Preparation
Shut down the crusher and all upstream/downstream equipment - feeders, conveyors, everything connected. Follow full lockout/tagout procedure and disconnect all power sources. This isn't a step to shortcut: an impact crusher rotor carries enormous stored energy even when stationary, and unexpected movement during teardown is one of the most common causes of serious injury in crusher maintenance.
2. Clear Buildup and Lock the Rotor
Open the housing and remove any material buildup around the rotor and aprons - packed material can prevent the rotor from moving freely and hide damage during inspection. Engage the rotor's locking pin or mechanism to prevent accidental rotation while you work inside the chamber.
3. Remove the Blow Bars
Check whether the existing blow bars are symmetric and can simply be flipped rather than replaced outright - this alone can extend wear-part life significantly. If they're beyond flipping, remove them in balanced pairs, never one at a time, to avoid introducing new imbalance later.
4. Remove Housing Covers and Wear Plates
Take off the crusher box lid, aprons, and side liners according to the manufacturer's sequence. Watch for loose material that may fall from the top of the aprons as panels come off.
5. Disconnect the Bearing Housing and Coupling
Loosen the coupling connecting the rotor shaft to the drive system, and remove the bearing housing bolts. Note the alignment marks before disconnecting - misalignment on reassembly is one of the most frequent causes of post-repair vibration.
6. Lift Out the Rotor Assembly
A full rotor assembly is a heavy, awkward load. Use lifting equipment rated at a minimum of 1.2 times the component's actual weight, and confirm the rigging points match the rotor's balance point before lifting clear of the housing.
7. Install the New Rotor and Check Alignment
Lower the new replacement crusher rotor into position, reconnect the coupling using your alignment marks, and torque all fasteners to the specifications in your manual - not by feel. Reinstall bearing housings, liners, and covers in reverse order.
8. Common Field Mistakes to Avoid
- Closing the housing without fully clearing debris from the base - leftover material compromises the seal and accelerates wear
- Skipping the coupling alignment check because "it looks fine"
- Reinstalling blow bars unevenly, reintroducing imbalance on a freshly installed rotor
- Rushing the fastener torque sequence on a component this heavy
What If You Don't Have the Original Drawings or Part Number?
This is where a lot of guides stop - and where a lot of real-world maintenance teams actually get stuck. If you're running an older machine, a rotor originally supplied by a manufacturer that's since discontinued the part, or equipment inherited from a previous site owner, you may not have a part number or drawing to reference at all.
In these cases, reverse engineering is a legitimate and common solution. A capable manufacturer can take your worn or damaged rotor, measure it directly, and rebuild a full 2D/3D drawing from those measurements - often within a few days of receiving the sample. This approach also opens the door to targeted improvements: if your original rotor design wasn't holding up well against your specific material (highly abrasive rock, high-moisture feed, excessive impact loading), the redesign process can adjust geometry or material composition to address that directly, rather than simply reproducing a part that was already underperforming.
Sourcing a Replacement Rotor: Materials, Lead Time, and Order Size
Material selection has a direct impact on how long your new rotor lasts. Common options include high-manganese steel, valued for its ability to work-harden under impact; chrome-molybdenum alloy steel, suited to higher-wear, higher-impact applications; and bi-metal wear-resistant construction, which combines a tough core with a hard-facing layer for extended service life. Precision casting and CNC machining, combined with proper quench-and-temper heat treatment, are what determine whether a rotor holds its balance and dimensional accuracy under sustained operating loads.
For procurement teams, a few practical factors matter beyond the technical spec sheet:
- Lead time: A typical production cycle for a custom or OEM-equivalent replacement crusher rotor runs 15–30 days, so planning replacement orders ahead of a rotor's expected end-of-life avoids emergency downtime.
- Order quantity: Not every operation needs to order in bulk. Suppliers offering low minimum order quantities - as few as 5 pieces - make it practical to test a new supplier's quality before committing to a larger purchase.
- Shipping terms: FOB and CIF terms out of major ports (Shanghai and Ningbo are common for China-manufactured parts) affect total landed cost and delivery timing, both worth confirming upfront.

Quality Checks Before You Accept a New Rotor
Before a replacement rotor goes into your crusher, it's worth confirming what quality checks the manufacturer actually performs - not just claims to perform. At minimum, look for:
- Spectral analysis of raw material composition, confirming the alloy matches specification
- Hardness testing (HRC) to verify the heat treatment achieved the intended wear resistance
- Coordinate measuring (CMM) inspection for dimensional accuracy, particularly critical for balance
- Non-destructive flaw detection, catching internal casting defects that visual inspection would miss
- Third-party inspection, when available, as an independent verification layer
These checks matter because a rotor that's slightly out of balance or dimensionally off won't show a problem on day one - it'll show up weeks later as premature bearing wear or unexplained vibration, undoing whatever cost savings the part offered upfront.
Post-Installation: Test Run and Long-Term Verification
Once the new rotor is installed, don't jump straight to full production. Run the crusher empty at low speed first, watching for unusual vibration, noise, or heat at the bearings. Gradually bring the machine up to normal feed rate while monitoring performance, and recheck fastener torque after the first few hours of operation - settling under initial load is normal, but loose fasteners are not.
Longer term, treat this replacement as a data point. Record the installation date, operating hours, and tonnage processed, so you can build an accurate wear-life baseline for your specific application. That baseline is what turns your next rotor replacement from a reactive scramble into a planned, budgeted maintenance event.
Looking for a replacement crusher rotor built to your original specifications - or need a worn rotor reverse-engineered because the drawings are long gone? Horbon Mining Parts manufactures OEM-equivalent and custom crusher rotors with full material traceability and quality documentation, supporting orders from small test batches to bulk production.