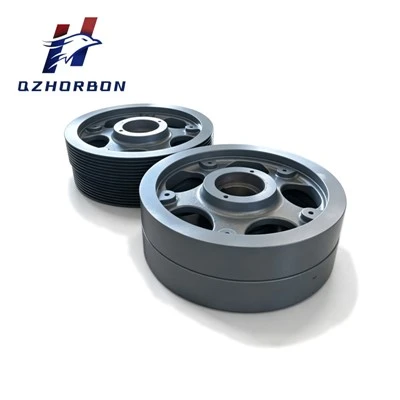

Installing a crusher rotor is more than lifting a new assembly into the machine and tightening a few bolts. A rotor can be dimensionally correct and still cause excessive vibration, bearing overheating, abnormal noise, or uneven wear if it is not seated, aligned, secured, and checked correctly.
For aggregate, mining, and recycling plants, a failed installation can turn a planned maintenance shutdown into additional production loss. This is especially important when installing a replacement crusher rotor on high-duty equipment, where the rotating assembly may weigh several tons. For example, Horbon's reference PFC1415P rotor assembly has a total assembly weight of approximately 8,150 kg, while its VSI4000 reference rotor uses a different high-speed, four-port design with a dedicated balance adjustment provision.
The key principle is simple: crusher rotor installation is not complete when the rotor is in position. It is complete when the rotor can rotate correctly, stay secure, run with acceptable vibration, and perform under load.

1. Check the Replacement Crusher Rotor Before Installation
The first step happens before the rotor enters the crusher.
Before moving the assembly, verify the crusher make, model, rotor part number, shaft dimensions, overall dimensions, component configuration, and assembly weight against your equipment documentation. Do not assume that two rotors with similar appearance are interchangeable.
For a replacement order, it is good practice to prepare the following information:
- Crusher manufacturer and model
- Existing rotor or assembly part number
- Rotor diameter and overall dimensions
- Shaft and bore dimensions
- Wear-part configuration
- Rotor assembly weight
- Engineering drawing, if available
- Required quantity and delivery schedule
A good supplier should be able to confirm compatibility from the crusher model and part number before production. Horbon states that replacement rotors can also be matched from engineering drawings or worn samples when available.
This incoming inspection step is also an important cost-control measure. Discovering an incorrect bore, missing component, or wrong wear configuration after the crusher has been opened is much more expensive than identifying the problem during receiving inspection.
2. Prepare the Crusher, Work Area, and Lifting Equipment
Before installation, isolate the crusher from all energy sources according to the site's lockout/tagout procedure. Remove residual material from the crushing chamber and make sure there is enough clearance for lifting and positioning the rotor.
The lifting system must be rated for the actual rotor assembly weight, not just the rotor body. A complete horizontal impact rotor may include the rotor body, shaft, hammers or blow bars, bearings, housings, seals, and drive components. Horbon's PFC1415P reference assembly, for example, contains 44 components and includes a rotor body, main shaft, plate hammers, bearings, bearing housings, labyrinth seals, and drive pulley.
Use certified lifting equipment and approved lifting points. Keep personnel outside the suspended-load area, and never try to correct rotor alignment manually while the assembly is suspended.
For large replacement projects, it is useful to prepare the lifting plan, tools, fasteners, measuring equipment, and replacement wear parts before the shutdown begins. This reduces the risk of extending downtime because one small installation item is missing.
3. Inspect the Shaft, Bearings, and Mating Surfaces
Once the old rotor has been removed and before the replacement rotor is installed, inspect every interface between the rotor and the crusher.
The crusher main shaft should be checked for scoring, corrosion, deformation, damaged threads, and abnormal wear. Before installing a replacement rotor, inspect the shaft journals, bearing seats, and other mating surfaces for damage or contamination. Bearing housings should also be checked for damage or contamination.
Any dirt or burr between mating surfaces can prevent the rotor from seating correctly. On a high-speed rotating assembly, even a small positioning error can become a significant dynamic problem after the machine reaches operating speed.
This is why shaft condition and rotor condition should be treated as one installation system rather than two separate components.
4. Position the Crusher Rotor Carefully
After inspection, lift the rotor and move it into its installation position according to the crusher manufacturer's procedure.
Do not force the rotor onto the shaft by hammering on critical machined surfaces. The assembly should be positioned accurately and allowed to seat through the intended mechanical interface.
The installation method depends on the crusher type.
Horizontal Impact Crusher Rotor
A horizontal impact crusher rotor typically works with a heavy rotor body, shaft, plate hammers or blow bars, and bearing assemblies. The main concern is maintaining the correct position of the rotor relative to the shaft, bearings, crushing chamber, and drive system.
Because the rotor operates under repeated impact loading, the integrity of the rotor body, hammer mass distribution, and shaft condition are important to mechanical stability.
VSI Crusher Rotor
A VSI crusher rotor operates differently from the rotor used in a horizontal impact crusher. Rather than using heavy swinging hammers, it accelerates material through high-speed rotor ports. As a result, port geometry, wear-component condition, shaft fit, and rotational balance are especially important. Rather than using heavy swinging hammers, a VSI rotor accelerates material through its ports at high speed. As a result, port geometry, wear-component condition, and rotational balance are especially important.
Horbon's VSI4000 reference rotor uses a four-port configuration and includes static balance adjustment bolt holes. Its rotor-to-shaft connection uses a taper-lock system designed to maintain concentricity during high-speed operation.

5. Secure the Rotor and Tighten Fasteners Correctly
Once the rotor has been seated, install the required locking components and fasteners using the crusher manufacturer's specified sequence.
This is not the right stage to guess bolt torque values. Fastener torque depends on the machine design, bolt size, grade, lubrication condition, and OEM specification. Use the equipment manual or approved engineering documentation for the correct torque and tightening sequence.
Pay particular attention to the crusher fasteners used for the rotor-to-shaft connection, bearing housings, locking components, wear parts, and drive system. Every critical fastener should be tightened according to the crusher manufacturer's specified sequence and torque requirements.
For horizontal impact crushers, worn or incorrectly secured hammers and locking components can change mass distribution as well as create a mechanical safety risk. For VSI equipment, wear components should be installed consistently because unequal component mass can affect rotor balance.
6. Check Rotor Alignment and Balance Before Start-Up
This is also where crusher rotor balancing becomes critical. A rotor may be mechanically secure but still generate excessive vibration if its mass distribution is outside the required balance condition.
A rotor can be fully assembled and tightly bolted yet still produce vibration if the shaft, bearings, drive components, or rotor itself are not correctly aligned.
Check that the rotor rotates freely as specified by the equipment manufacturer and that there is no abnormal contact with stationary components. Confirm bearing and housing installation, shaft position, and drive alignment before fitting guards and starting the machine.
Balance is equally important.
For a rotating assembly, balance means that the mass is distributed sufficiently evenly around the axis of rotation. If one side is heavier, centrifugal forces increase rapidly with operating speed. This can produce vibration and impose additional loads on bearings and other components.
Horbon states that complete replacement rotor assemblies undergo static balance verification before dispatch. For its VSI4000 reference rotor, balance adjustment bolt holes are also provided for field correction after wear-part installation.
7. Perform a Controlled No-Load Trial Run
Never treat the first start-up as the final step of installation without observation.
After confirming that all guards, covers, lubrication systems, and safety devices are correctly installed, perform a controlled no-load test according to the machine manufacturer's procedure.
During the initial run, monitor:
- Abnormal vibration
- Unusual mechanical noise
- Bearing temperature
- Rotor movement or instability
- Drive condition
- Oil or seal leakage
- Fastener or housing movement
The purpose of a no-load run is to identify mechanical problems before the crusher is exposed to full impact loads.
If the machine immediately develops abnormal vibration, stop and investigate rather than assuming that it will disappear after the crusher is loaded. A vibration problem can be associated with rotor imbalance, incorrect seating, drive misalignment, loose components, bearing problems, or uneven wear-part mass.
8. Introduce Load Gradually and Recheck the Rotor
Once the no-load test is satisfactory, introduce material gradually according to the crusher manufacturer's operating procedure.
Do not use the first full-load run to discover whether the rotor was installed correctly.
Watch for changes in vibration, noise, bearing temperature, throughput, and product characteristics. On impact crushers, abnormal wear or an unstable rotor can eventually affect product size and equipment availability.
After the initial operating period, recheck the accessible fasteners, bearings, guards, and other installation points according to the machine's maintenance schedule.
For ongoing operation, installation quality should be followed by a proper maintenance plan rather than treating the replacement rotor as a one-time project.
Common Crusher Rotor Installation Problems and Their Causes
|
Symptom After Installation |
Possible Cause |
What to Check |
|
Excessive vibration |
Rotor imbalance or incorrect seating |
Rotor balance, shaft interface, wear-part mass |
|
Bearing overheating |
Misalignment or bearing installation issue |
Shaft, bearing, housing, lubrication |
|
Abnormal noise |
Loose or incorrectly installed components |
Fasteners, locking system, guards, wear parts |
|
Uneven wear |
Rotor alignment or unequal wear-component mass |
Rotor position and component condition |
|
Rotor movement |
Incorrect connection or loose fasteners |
Shaft connection and retaining hardware |
|
Performance instability |
Rotor configuration or wear condition |
Wear parts, rotor geometry, operating conditions |
One useful rule for maintenance teams is to diagnose the symptom before replacing additional components. Replacing a bearing, for example, will not solve a rotor imbalance problem.

Complete Rotor Replacement or Rotor Rebuild?
Not every maintenance event requires a complete new rotor.
A rotor rebuild may be more economical when the structural rotor body and main shaft remain serviceable and only wear components have reached their replacement limit. On a horizontal impact crusher, this may mean replacing plate hammers, wedge blocks, and related wear components. On a VSI, the wear package can include wear plates, trail plates, tip holders, wear rings, and distributor components.
A complete replacement crusher rotor becomes more attractive when the rotor body has structural damage, bore wear beyond acceptable limits, serious cracking, or when the cumulative cost of repeated component replacement is no longer economically justified.
For procurement teams, the best decision is therefore not simply "new or old rotor." It is:
What level of replacement gives the lowest total maintenance cost while protecting machine availability?
Final Crusher Rotor Installation Checklist
Before returning the crusher to regular service, confirm that:
- The replacement rotor matches the crusher model and part number.
- Rotor dimensions and shaft interfaces have been verified.
- The shaft, bearings, and mating surfaces have been inspected.
- The rotor is correctly seated and secured.
- Fasteners have been tightened to the approved specification.
- Wear components are correctly installed and mass-balanced where required.
- Rotor alignment and balance have been checked.
- Guards and safety devices are installed.
- A no-load trial run has been completed.
- The crusher has been loaded gradually and monitored for abnormal vibration, noise, or temperature.
Conclusion
A successful crusher rotor installation is not simply a lifting and bolting operation. It is a controlled process that begins with compatibility verification and ends with a monitored trial run.
For plant operators and procurement teams, the most effective way to reduce installation-related downtime is to treat the rotor, shaft, bearings, wear components, drive system, and balance condition as one rotating system. The more accurately these interfaces are checked before start-up, the less likely a new rotor will create new vibration, premature bearing wear, or another avoidable shutdown.
When selecting an OEM-compatible replacement crusher rotor, ask the supplier to confirm the crusher model, part number, key dimensions, component configuration, inspection requirements, and balance condition before production. A technically suitable rotor is not just a replacement part-it is a critical rotating assembly that must be ready to perform in the crusher from the first start-up.
FAQ
How long does it take to install a crusher rotor?
Installation time depends on the crusher model, rotor weight, access conditions, lifting equipment, and whether bearings or wear components are also being replaced. For large industrial crushers, preparation and inspection can be as important as the lifting operation itself.
Does a replacement crusher rotor need to be balanced?
Yes, balance should be addressed for any high-speed rotating assembly. Complete replacement assemblies should be checked according to the applicable engineering requirements, and wear-component replacement can change the rotor's mass distribution. Horbon states that its complete rotor assemblies undergo static balance verification before dispatch.
What causes vibration after crusher rotor installation?
Common causes include rotor imbalance, incorrect seating, shaft or bearing problems, drive misalignment, loose components, or uneven wear-part mass. Start with the installation interfaces and balance condition before replacing unrelated components.
Can a worn crusher rotor be rebuilt instead of replaced?
Often, yes. If the rotor body, shaft, and critical interfaces remain within acceptable condition, replacing wear components may be more economical than buying a complete rotor assembly. The correct choice depends on the condition of the structural components and the total cost of continued maintenance.
What information should I provide when ordering a replacement crusher rotor?
Provide the crusher manufacturer, model, existing rotor or assembly part number, key dimensions, required quantity, and delivery requirements. An engineering drawing or worn sample can also help a manufacturer confirm compatibility.