
Introduction
You just spent a significant budget on a replacement crusher rotor. It arrived on spec, passed incoming inspection, and got bolted in. Then, six weeks later, a bearing runs hot, vibration creeps past the alarm threshold, and the rotor that was supposed to last 8,000–10,000 hours is already showing uneven wear. Sound familiar?
This is one of the most common - and most preventable - problems B2B buyers run into after a rotor replacement. The rotor itself is rarely the root cause. In most cases, the failure traces back to how the rotor was operated in its first days and weeks of service: an aggressive first start, a missed balance check, or an operator who didn't recognize early warning signs until the damage was already done.
This guide walks through the daily operation standards and precautions that actually determine whether a replacement rotor hits its designed service life - covering start-up protocol, ongoing balance monitoring, wear-based replacement thresholds, and the lockout procedures that protect both the equipment and the people working on it.

1. The First 24–48 Hours: Why "No-Load Start" Isn't Optional
A new or replacement rotor has not yet settled into its bearings, and any residual manufacturing tolerances haven't been "worked in" under real load. Starting the crusher with a loaded chamber immediately after a rotor swap is one of the fastest ways to induce premature bearing wear or micro-imbalance that compounds over time.
Practical standard: always start the crusher with an empty chamber, let it reach full operating RPM, and hold it there for several minutes before introducing feed material. During this window, watch for:
Unusual noise at the bearing housings (a low-frequency knock often signals a mounting or alignment issue, not the rotor itself)
Vibration readings noticeably above baseline
Any asymmetric heat buildup across the bearing pair
If any of these appear, stop and re-check the installation before resuming - running through it "to see if it settles" is how a $0 fix turns into a full rotor replacement two weeks later.
(For buyers still finalizing their purchase, this is also where budget planning matters - a rotor selected purely on upfront price with no allowance for commissioning and monitoring time often ends up costing more in the long run.
2. Daily Balance and Vibration Monitoring - Not Just "Listen for Noise"
Rotor imbalance is repeatedly cited across the industry as a top cause of unplanned crusher downtime, and it's rarely sudden. It builds gradually as blow bars wear unevenly, material builds up on one side of the rotor, or a bolt loosens on one segment. The problem is that most daily checklists tell operators to "check for unusual vibration" without giving them a concrete way to track it.
A more useful daily routine looks like this:
Log vibration readings at a fixed point on the bearing housing at the same time each shift, so trend - not just absolute value - becomes visible. A gradual 15–20% rise over a week is a far stronger signal than a single high reading.
Visually inspect blow bar wear symmetry across rotor rows during scheduled stops. Uneven wear on one side versus the other is an early indicator of developing imbalance, well before it shows up on a vibration gauge.
Check for material buildup inside the rotor cavity or on counterweights - packed material effectively adds uneven mass and is a frequently overlooked imbalance source, especially with wet or sticky feed.
None of this requires expensive instrumentation - a handheld vibration meter and a simple daily log are enough to catch developing problems weeks before they become failures.
3. Knowing When to Rotate, Repair, or Replace Wear Components - With Numbers, Not Guesswork
One of the biggest gaps in most crusher maintenance guidance is vague language like "replace when worn." Operators need thresholds they can actually act on:
Blow bars / hammers: many high-chrome designs use multiple working faces. A practical rule is to rotate the bar once the leading edge has worn down by roughly 50%, exposing a fresh face rather than running it to failure.
Wear plates and liners inside the rotor assembly: general industry guidance points to replacement once wear exceeds roughly 70% of original thickness - beyond that point, the rate of wear accelerates and the risk of a structural break increases sharply.
Rotor disc and shaft: any visible crack, deformation, or a bearing seat showing signs of fretting is a stop-and-inspect condition, not a "monitor and continue" condition. Rotor body damage is not a wear-part issue - it affects the whole assembly's balance and safety.
Tracking these thresholds against your specific tonnage and material hardness (rather than relying on a generic monthly calendar) gives a far more accurate picture of when a replacement rotor is actually approaching end of service life versus when a targeted component swap will do.
(Since wear rates and duty cycles vary significantly between rotor designs - cast one-piece bodies versus stacked-disc construction, different alloy grades, different row counts - buyers comparing options often find it useful to see the parameters side by side. )

4. Safety Protocol During Inspection and Maintenance: LOTO Isn't a Formality
Because rotor-related failures often involve high-speed rotating mass and stored kinetic energy, safety protocol during any inspection or adjustment isn't optional paperwork - it's the difference between a routine check and a serious incident.
Non-negotiable steps before anyone enters the crushing chamber or works near the rotor:
Full energy isolation - lock out the motor, verify zero speed, and tag the control panel before opening any access panel.
Never attempt to clear blockages or make adjustments while the rotor is turning, even partially. Residual momentum in a large rotor mass can cause serious injury even after the motor is cut.
Confirm all guards and covers are back in place before restart - a missing guard or an unlatched inspection window is one of the most common findings in post-incident reviews and should block a restart entirely.
Keep loose clothing, long hair, and jewelry secured anytime work is performed near the rotor, even during brief visual checks.
Building these steps into a standard operating checklist - rather than trusting individual judgment shift to shift - is what actually prevents the "it was working fine yesterday" incidents that catch operations off guard.
Conclusion: Turning Daily Discipline Into Rotor Lifespan
A replacement crusher rotor is only as good as the operating discipline applied to it from day one. The technical spec sheet determines its theoretical service life; daily practice determines whether it actually gets there. To summarize the actionable standard:
Always commission a new rotor with a no-load start and monitor closely during the first operating cycles
Track vibration and wear symmetry daily, not just when something sounds wrong
Use concrete wear thresholds (50% face wear, 70% liner thickness) instead of vague "replace when worn" guidance
Treat lockout/tagout as a fixed step before any inspection, with zero exceptions
Operations that build these habits into standard shift procedures consistently get more operating hours out of every rotor they install - and avoid the costly surprise of an early failure just weeks after a replacement.
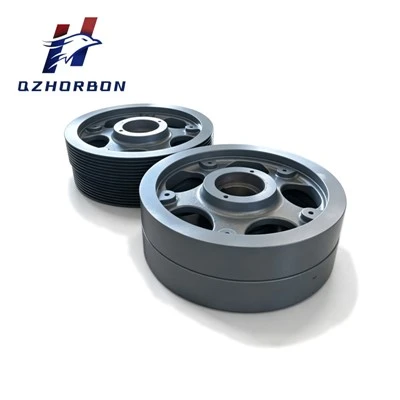
If you're currently sourcing a replacement rotor and want to confirm fit, balance certification, and lead time before your next scheduled changeover, you can review our Replacement Crusher Rotor product line for specifications and manufacturing details.
FAQ
Q1: How often should a crusher rotor be inspected?
A full visual and dimensional inspection is typically recommended at scheduled maintenance intervals (often tied to operating hours rather than calendar time), but daily vibration checks and visual wear checks should happen every shift regardless of hour count.
Q2: What are the first signs a crusher rotor needs replacement rather than repair?
Visible cracking or deformation in the rotor disc or shaft, a bearing seat showing fretting damage, or vibration that continues rising even after blow bars and liners have been replaced - these point to the rotor body itself, not just its wear parts.
Q3: Can rotor imbalance be fixed without replacing the whole rotor?
Often yes, if caught early. Rebalancing, correcting uneven blow bar wear, or clearing material buildup can resolve moderate imbalance. Left unaddressed, however, it accelerates bearing wear and can eventually damage the rotor body itself.
Q4: How long should a replacement crusher rotor last?
This varies by material hardness, tonnage, and rotor design, but a well-operated and properly monitored rotor should reach - or exceed - its manufacturer-rated service life. Poor commissioning practices or delayed wear-part replacement are the most common reasons rotors fall short of that figure.
Q5: Is OEM replacement always the safer choice for rotor replacement?
Not necessarily - a well-engineered aftermarket rotor built to matching or tighter tolerances can perform equally well, provided the balance certification and installation fit are verified. This is worth evaluating on performance parameters rather than assumption alone.